


How to Install WordPress on Hostinger: A Step-by-Step Tutorial for Beginners

Starting a website can feel like a big task, but with WordPress and Hostinger, it’s easier than ever to launch a professional site in just a few steps. Hostinger provides beginner-friendly hosting services, and WordPress is one of the most popular website platforms worldwide. Whether you’re starting a blog, business website, or personal portfolio, this guide will show you how to install WordPress on Hostinger with ease.
Let’s jump into this beginner-friendly tutorial!
Note: If you are planning to purchase Hostinger, Use this Purchase link and apply the special coupon “BM0PRASHAPM8“. Comment back here with the “Surprise” extra saving that you got using our coupon code. 🙂
1. Why Choose WordPress with Hostinger?
Starting with the basics, let’s understand why WordPress and Hostinger make an ideal pair. WordPress is the most popular content management system, and for good reason: it’s flexible, easy to use, and packed with features. Hostinger, on the other hand, is known for its reliable performance and budget-friendly pricing, making it perfect for beginners.
When you combine WordPress with Hostinger, you get a powerful combination of flexibility and affordability. Hostinger’s plans are optimized for WordPress, which means faster speeds, enhanced security, and more accessible customer support.
2. Step 1: Choose a Hosting Plan with Hostinger
Before we can install WordPress, you’ll need to choose a hosting plan. Head over to Hostinger’s website and explore their WordPress-specific hosting options. They offer multiple plans that include features like free SSL certificates, managed WordPress updates, and 24/7 support.
If you’re just starting out, the Single WordPress plan might be a good choice as it provides all the essentials. For those looking to grow quickly, the WordPress Premium or Business plans offer additional storage, speed boosts, and enhanced features.

3. Step 2: Create Your Hostinger Account
Once you’ve selected your hosting plan, the next step is to create a Hostinger account. This is straightforward: click on “Add to Cart” for the plan you selected, then follow the instructions to set up your account. You’ll need to provide some basic information like your name, email address, and payment details.
After completing the sign-up process, Hostinger will send you a confirmation email. Click the link in the email to verify your account, and you’ll be ready to move to the next step.

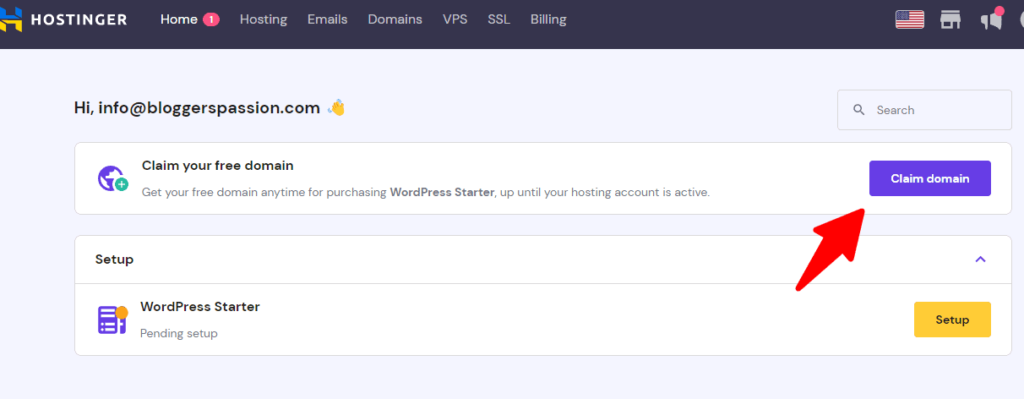
4. Step 3: Access Hostinger’s Control Panel (hPanel)
After setting up your account, it’s time to explore Hostinger’s control panel, also known as hPanel. Hostinger’s hPanel is designed for simplicity and is beginner-friendly. Once logged in, you’ll find all the tools and features needed to manage your website, including the WordPress installation tool.
From the hPanel, navigate to the hosting section. Select the hosting plan you purchased, and you’ll see options for setting up a new website or managing an existing one.
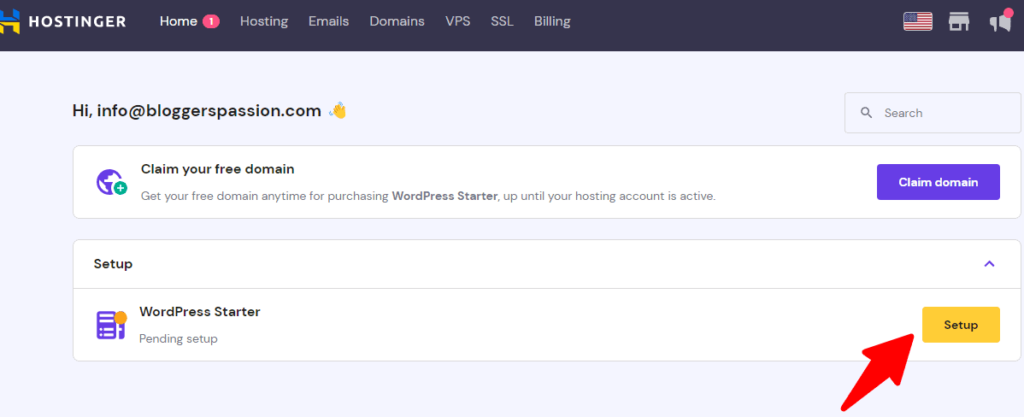
5. Step 4: Start the WordPress Installation
With Hostinger, installing WordPress is a breeze. In the hPanel, look for the Auto Installer tool. This tool simplifies the process by handling the technical details for you. Once you open the Auto Installer, you’ll see WordPress as one of the top options.
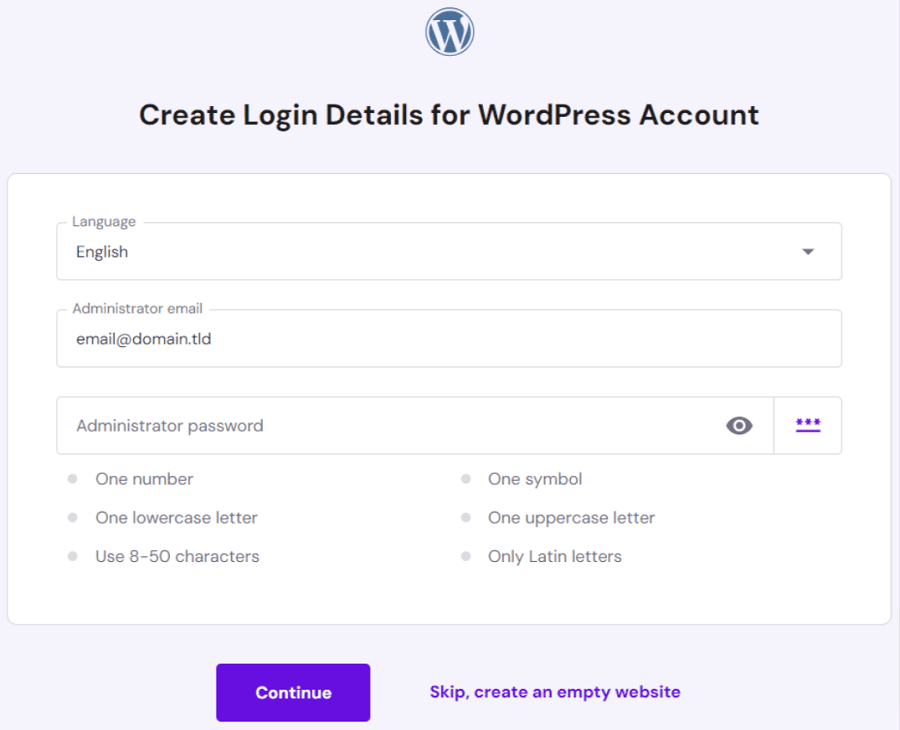
Click on WordPress, and Hostinger will guide you through a few quick setup steps. Here, you’ll be asked to enter your website’s name, admin email, and password. Be sure to write down these credentials as they’ll be needed to log into your WordPress dashboard later.
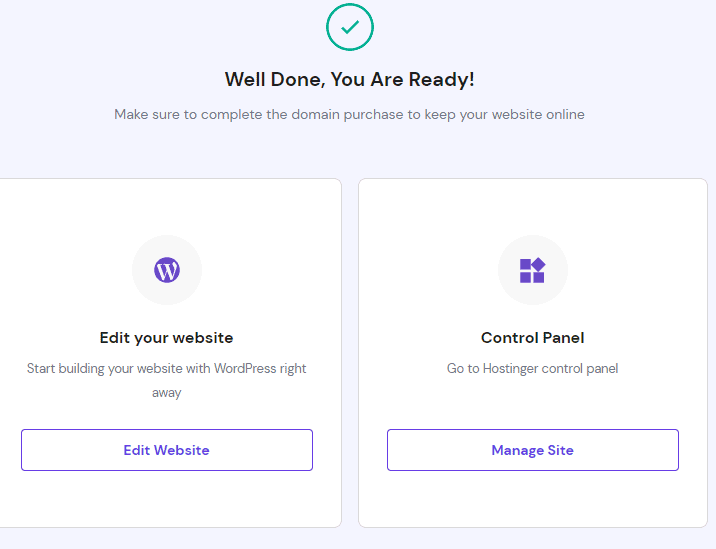
6. Step 5: Configure Your WordPress Settings
After the installation process, it’s time to configure some essential settings for WordPress on Hostinger. Start by logging into your WordPress dashboard using the credentials you set up during installation. You can access your dashboard by going to yourwebsite.com/wp-admin.
Once inside, take a moment to set up some basic settings under Settings > General in your dashboard. Update your site title, tagline, and other essentials. Next, head over to Settings > Permalinks to choose a URL structure for your posts – we recommend selecting “Post name” for cleaner and more SEO-friendly URLs.
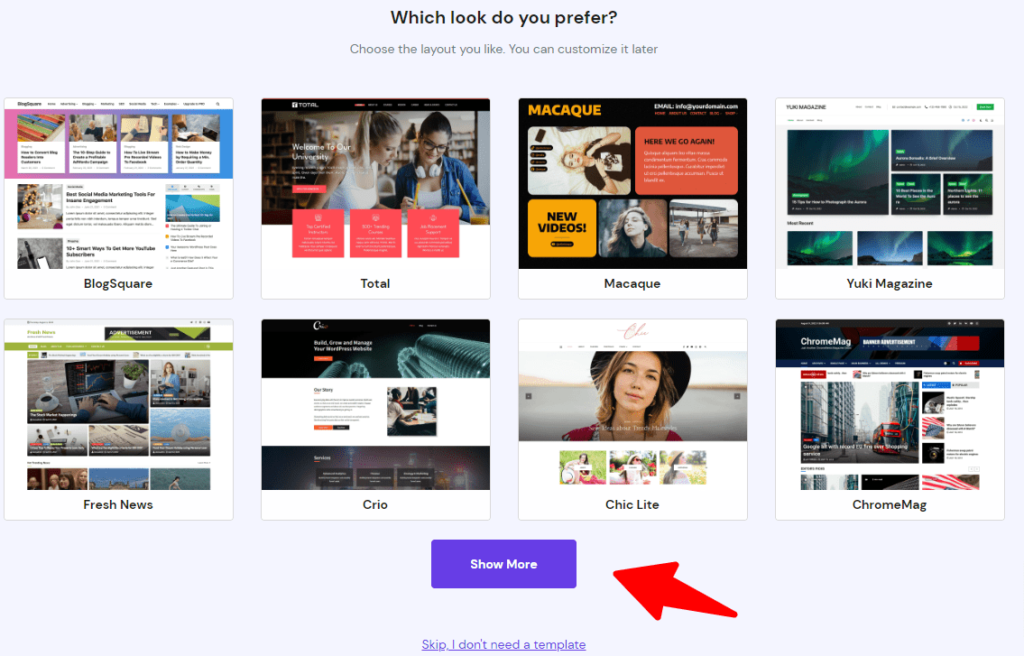
7. Step 6: Choose a WordPress Theme
The next step is choosing a WordPress theme to define your site’s look and feel. WordPress has a vast library of free and premium themes that cater to various industries and styles. To select a theme, go to Appearance > Themes in your WordPress dashboard, then click Add New to browse the available options.
Select a theme that aligns with your brand or niche. You can preview themes before committing to see how they look on your site. Once you’re happy with a theme, click Install and Activate to make it live.
8. Step 7: Install Essential Plugins for WordPress
Plugins are a vital part of the WordPress experience, adding new features and functionality to your site. To get started, go to Plugins > Add New in your WordPress dashboard. Here are a few recommended plugins to install:
- Yoast SEO – Optimize your site for search engines.
- WPForms – Add contact forms easily.
- Elementor – Customize your site with a drag-and-drop builder.
- UpdraftPlus – Create site backups.
These plugins will enhance your WordPress site on Hostinger and make it easier to manage, optimize, and customize.

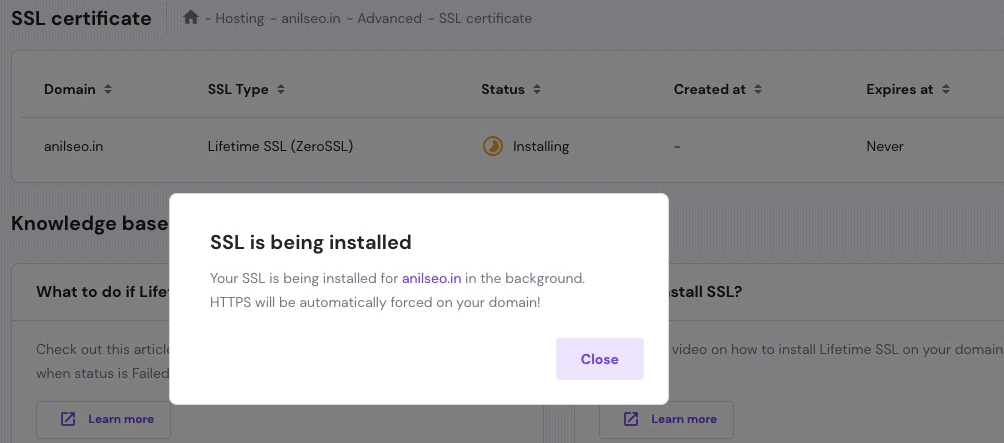
9. Step 8: Secure Your WordPress Site on Hostinger
Security is crucial for any website, and Hostinger offers several ways to keep your WordPress site safe. First, make sure you enable the SSL certificate that comes with most Hostinger plans. This will encrypt your website, adding an extra layer of security for visitors.
Additionally, consider installing a security plugin like Wordfence or Sucuri Security for added protection. Hostinger also offers periodic backups, so you can restore your site in case of any issues.
10. Step 9: Launch Your WordPress Site and Go Live!
Congratulations! You’ve successfully set up WordPress on Hostinger. Now it’s time to launch your site. Before you go live, review your website, check for any last-minute adjustments, and ensure that everything is working as expected. Don’t forget to test your links, forms, and plugins.
When you’re ready, simply start sharing your website link with your audience. You’re now a proud owner of a WordPress site hosted on Hostinger!

Final Tips to Make the Most of WordPress on Hostinger
Now that your site is live, take some time to explore WordPress features and continue customizing your website. Content is key, so start by creating valuable pages, writing blog posts, and optimizing for SEO. Hostinger’s support team is always available if you need help with advanced settings or troubleshooting.
With a WordPress Hostinger setup, you’re ready to grow your online presence and reach your audience effectively. Good luck, and happy blogging!
Read More : – How to Start a New Blog: A Step-by-Step Guide for Beginners


paper.io unblocked games. thanks for your post
Thanks for sharing. I read many of your blog posts, cool, your blog is very good.
good post for unblocked games. thanks
Thank you for your sharing. I am worried that I lack creative ideas. It is your article that makes me full of hope. Thank you. But, I have a question, can you help me?
thanks for details. Must visit unblocked web site
It was amasing post. Lets try to plau unblocked games
Thanks for sharing. I read many of your blog posts, cool, your blog is very good.
There are some attention-grabbing cut-off dates in this article but I don’t know if I see all of them heart to heart. There is some validity but I’ll take hold opinion till I look into it further. Good article , thanks and we want extra! Added to FeedBurner as properly
Your point of view caught my eye and was very interesting. Thanks. I have a question for you.
drift boss new game site. thanks for article
Adorei este site. Para saber mais detalhes acesse nosso site e descubra mais. Todas as informações contidas são informações relevantes e diferentes. Tudo que você precisa saber está ta lá.
Thanks for sharing. I read many of your blog posts, cool, your blog is very good.
Super hits maker. Come to unblocked games
Your point of view caught my eye and was very interesting. Thanks. I have a question for you.
Howdy! This is my 1st comment here so I just wanted to give a quick shout out and say I genuinely enjoy reading your posts. Can you recommend any other blogs/websites/forums that deal with the same topics? Thanks for your time!
Roulette strategy is fascinating – probability & risk are key! Seeing platforms like PH987 Login prioritize smooth service alongside the games is impressive. A good experience matters so much! It’s all about optimizing those touchpoints.
Thanks for sharing. I read many of your blog posts, cool, your blog is very good.
I would like to thnkx for the efforts you’ve put in writing this blog. I am hoping the same high-grade website post from you in the upcoming as well. In fact your creative writing abilities has encouraged me to get my own web site now. Really the blogging is spreading its wings fast. Your write up is a good example of it.
I don’t think the title of your article matches the content lol. Just kidding, mainly because I had some doubts after reading the article.
Agar live games thanks for post
Listen your heart this is unblocked games web site
I don’t think the title of your article matches the content lol. Just kidding, mainly because I had some doubts after reading the article.
Can you be more specific about the content of your article? After reading it, I still have some doubts. Hope you can help me.
I don’t think the title of your article matches the content lol. Just kidding, mainly because I had some doubts after reading the article.
I am now not certain where you’re getting your information, but great topic. I must spend a while learning much more or figuring out more. Thanks for wonderful info I was on the lookout for this info for my mission.
I would like to thnkx for the efforts you’ve put in writing this site. I’m hoping the same high-grade website post from you in the upcoming also. In fact your creative writing skills has encouraged me to get my own website now. Actually the blogging is spreading its wings rapidly. Your write up is a great example of it.
of course like your web site however you need to check the spelling on quite a few of your posts. Several of them are rife with spelling issues and I find it very troublesome to inform the reality nevertheless I’ll surely come back again.
Thanks for sharing. I read many of your blog posts, cool, your blog is very good.